Hardness Testing Changes with the Times
As 2020 marks the 100-year anniversary of the world’s first commercial hardness tester, the technology is as significant as ever.

Today’s hardness testers, including the Universal 4000 from Buehler, can help with increasing quality demands.
Component manufacturers across the manufacturing spectrum—such as in automotive, aerospace, electronics, medical, energy and other fields—must ensure that their parts meet engineers’ specifications. In addition to metrology, mechanical testing and nondestructive testing methods, among others, hardness testing is an important method of testing part quality.
Material hardness testing gauges a material’s strength by measuring how well it stands up to penetration efforts. Because this form of testing shows how easily part materials can be machined and how long they will resist wear, it is helpful to engineers as they design parts.
Hardness tests come in various forms: Rockwell, instrumented indentation, and ball indentation measure the depth of indenter penetration, while Vickers, Knoop, and Brinell gauge the size of the impression left by the indenter. And now some niche methods, such as Leeb—otherwise known as the ball-rebound test—or ultrasonic devices are sometimes used to estimate the hardness in the field.
Staying relevant
Hardness testing remains relevant as materials and production methods evolve.
With the advent of globalization, parts are increasingly manufactured on disparate production lines within different areas of the globe. With such variation comes increased margins for error, and a greater need for uniformity of hardness, says John Richardson, product coordinator at The L.S. Starrett Company. This should translate to increased demand for hardness testing in the near future, he says.
Whether it’s being used throughout the manufacturing process, or as a final check, hardness testing is a surefire way to check the quality of components, says Jarid Barthold-Robinson, product specialist of physical measurements at Shimadzu Scientific Instruments.
“Whether it’s the duration of a heating or coating process, the temperature of such processes, or other environmental conditions, hardness testing can gauge the effectiveness of these process controls,” he says. “By characterizing hardness and varying process conditions, an optimal result can be obtained.”
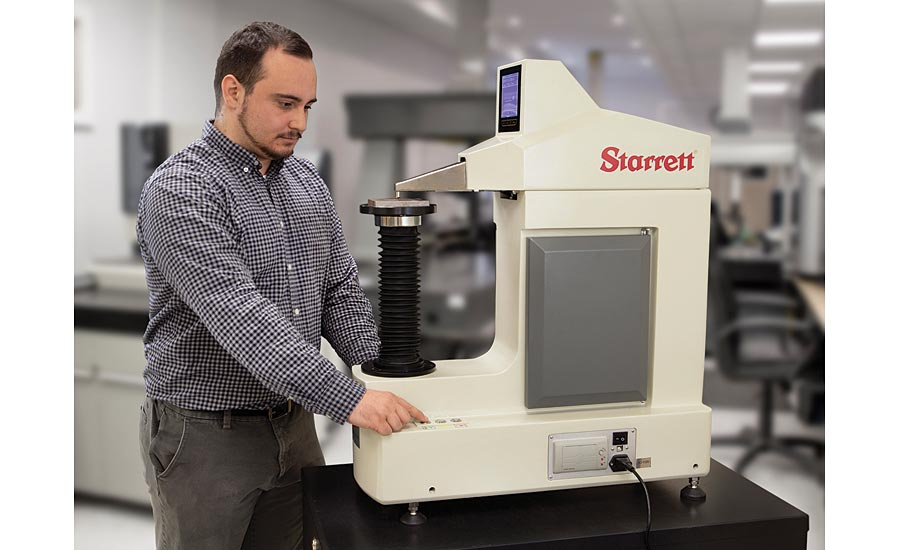
An operator stands next to the new Starrett Digital Rockwell/ Superficial Rockwell Benchtop hardness tester No.3824 with fully automated load/ unload procedures, and capable of providing highly accurate readings.
Increasing demands
As an increasing number of demands—as well as government and commercial applications—are placed on consumer products, research into the materials comprising these products has increased, Barthold-Robinson says.
“The lifecycle of products that are subjected to environmental wear of surfaces is greatly affected by the hardness of these surfaces,” Barthold-Robinson says. “Whether a phone screen or the coating on a piece of tooling, consumers and industry professionals demand long life and optimum performance.”
Richardson agrees. “Certainly, greater importance has been placed on the hardness of materials commonly used,” he says. “Overall quality requirements have deepened the quest for better hardness technology, increased portability, greater accuracies and versatility.”
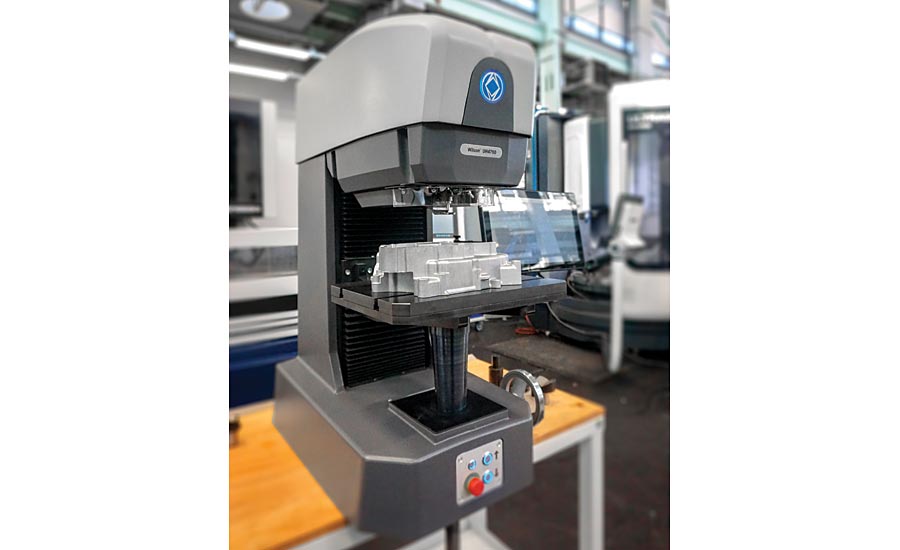
Hardness testers continue to adapt to today’s quality requirements.
New materials
Additionally, the new surface materials that correspond to today’s optics—which range from electronic screens to lenses—especially warrant hardness testing for shallow depths, says Barthold-Robinson.
“Hardness testing—where an indent is measured after the indenter contacts the surface—is deficient in many ways,” he says. “For treated surfaces, such as those exposed to an ion exchange process, the layer is too thin to characterize with the resolution of traditional hardness testers. Surfaces with a soft coating are difficult to characterize with a traditional hardness tester as the indent is within the elastic region of the material, causing the material to reform before the indent is read optically.”
The solution, Barthold-Robinson says, is to employ a hardness tester that can actively read the displacement as the indent is performed.
“In addition to having a high-precision LVDT [sensor] that can measure very shallow depths, the displacement measurement device can measure the rebound porting of the indent, and from here the indentation modulus can be determined,” he said.
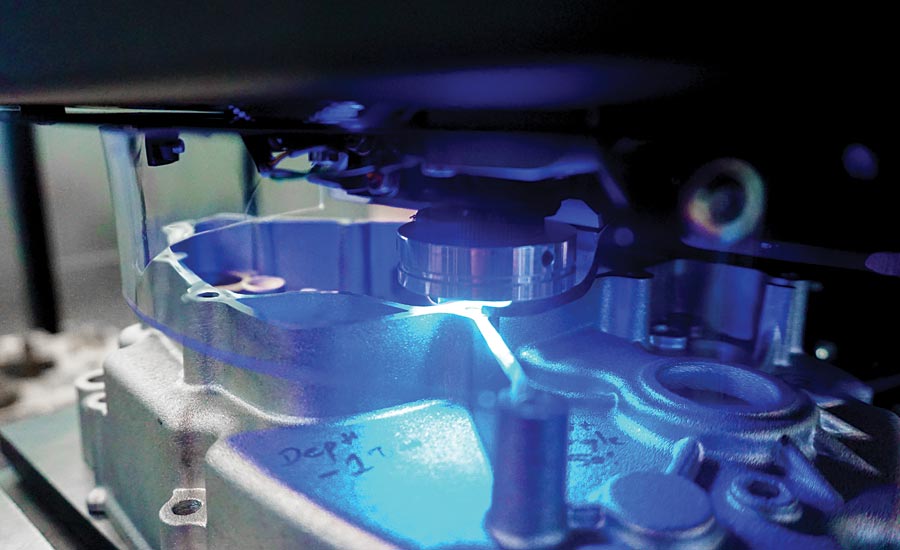
A hardness tester from Buehler is shown here testing castings.
The increase of automation
As hardness testing increasingly becomes software-controlled, measurements are able to be performed automatically and without user interaction, says Matthias Pascher, hardness product manager at Buehler.
“This level of automation requires advanced designs and distinct imaging algorithms to meet the high level of repeatability and accuracy that is required,” Pascher says.
Ultimately, hardness testing is oriented toward improved usability and, one day, full connectivity and automation, he adds.
Richardson envisions the field being democratized as automated systems become more popular. As automation becomes mainstream, more companies will be able to afford load cell technology, which increases hardness testing accuracy. Weighted units will “become a thing of the past,” says Richardson.
“While not new, the increase of load cell driven product now coming to market at more competitive price levels brings load-cell technology to mid-level price range users,” which means better performance on a larger scale, Richardson says.
Automation will bring the sea change, experts say.
“We will see more automatic systems sold that can be programmed and handle the testing applications for the day without operators present,” Richardson says. “At the moment, this is generally limited to a small sector of the market.”
The advent of digitized hardness testing means the technology can be performed efficiently, with fewer errors, according to Pascher.
“With industry 4.0, i.e., the full connectivity and digitalization of industrial production processes, test-result-generation and administration are very important to fulfill and provide for the end customer of manufactured parts and components,” he says. “In hardness testing, test result traceability and data management are key to ensure performance and networkability in highly automated environments.”
This development is promising for companies who use older analog hardness testers, says Pascher. While these testers are still in working condition and usable, according to Buehler, they’re not able to “meet today’s quality control standards of tracking test data besides manually recording handwritten tables.”
“A recent development in the industry is upgrading these older testers to include automation, software and imaging systems,” Pascher adds. “These upgrades allow these older testers to comply with more recent standards for data recording while also improving efficiency through automation.”
Automation of hardness testing has not only improved the accuracy and repeatability of hardness testing, but has also improved throughput, Barthold-Robinson says.
“This higher throughput is related to both the actual measurements and the sample preparation. Grinding and polishing is a time-intensive part of the hardness testing process, so advances in automation in these processes have a drastic effect on throughput,” he explains.
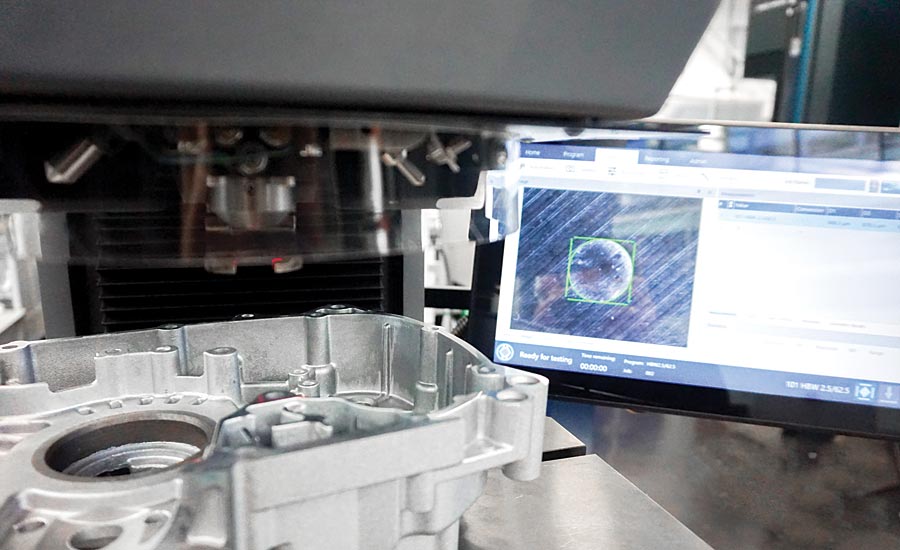
It features the target laser and ring light in addition to the DiaMet hardness software.
Portability on the rise
Portable hardness testers are another trend, as they will continue to evolve and improve to handle a greater number of applications effectively, says Richardson.
“The need for portability has increased immeasurably over the past 20 years,” he says.
“The market for portable hardness testers is now equal to or larger than that of bench hardness testers.”
Pascher notes that this year holds a special significance for hardness testing technology, as it marks the 100-year anniversary of the world’s first Rockwell Hardness tester, which Wilson Hardness put on the market in 1920.
“This invention by Stanley Rockwell revolutionized the industry,” Pascher says, “and has paved the way for the additional innovations.”
Looking for a reprint of this article?
From high-res PDFs to custom plaques, order your copy today!


.jpg?height=200&t=1738009418&width=200)
